Buzzings from a quilter who bumbles her way through life!

Saturday, July 31, 2010

My Favorite Book on Quilting

I love books, so the title is really a little misleading. I have a LOT of books and many are favorites for certain areas of quilting, but there is one comprehensive guide to quilting that I have used since I first started quilting. I am "self-taught", so when I first started quilting I searched for a book that would cover most of the bases. This is the book I used. I love it! I still use it. In fact, as you can tell by the photo, it has been used so much it is coming apart. I need to have it spiral bound or something. It gives you a little advice about just about every area of quilting. It is published by Rodale  and is The Quilters Ultimate Visual Guide. The editor is Ellen Pahl and it is written like an encyclopedia with entries by 60 expert quilters. It was published in 1997. I love it so much, it is the one book I grab when I need something for a trip and I want a quilting book. It is full of tips labeled "Try This" that give tidbits of information that are "above and beyond" the basics. There are also little boxes called "Taking the Trouble Out of...." and there you find further information about solving problems you may have had in quilting. You can find it in a lot of quilt shops or at www.amazon.com. and www.rodalestore.com.   It is also available for the Kindle. So next time you need a good book, or want to give a gift to a quilting friend, take a look at  The
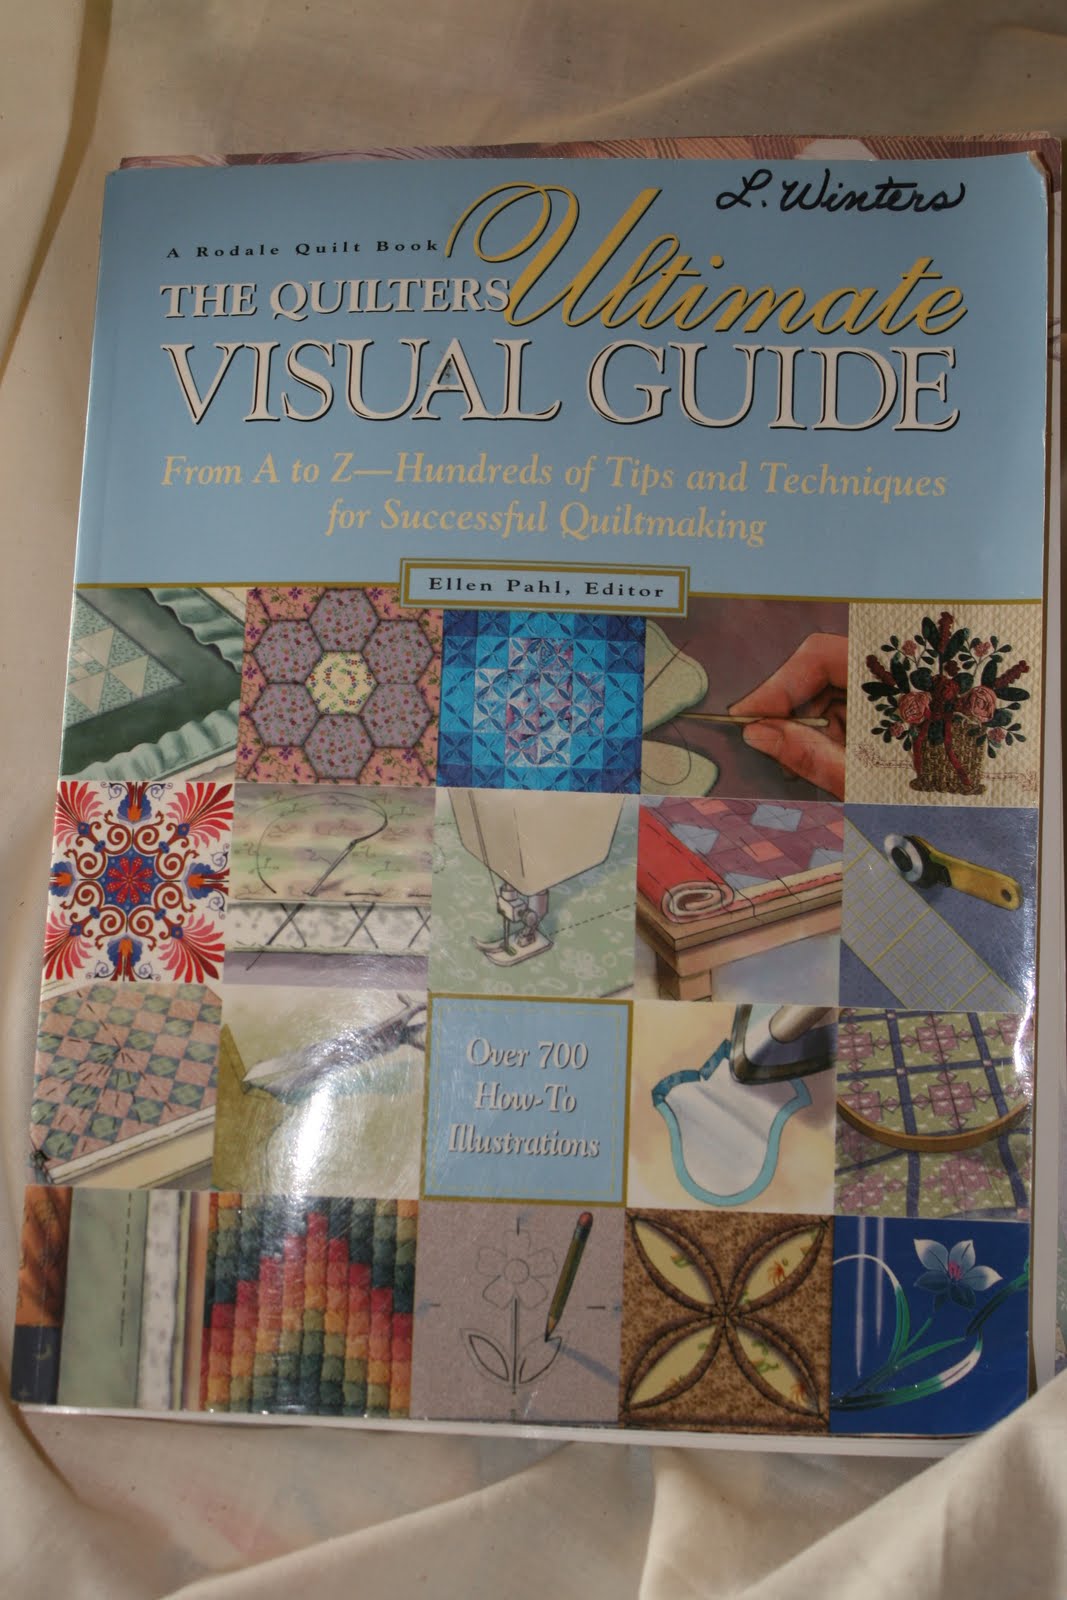
Quilters Ultimate Visual Guide.
(I have no affiliation with this book or publisher. I just think its a really good book!!!!)

Tuesday, July 27, 2010

The Right Needle for the Job

Choosing the best needle for the work you're doing is not as easy as just finding a needle among the pins in a pin cushion. Any needle may take the thread through the fabric, but the right needle will make this job much easier.
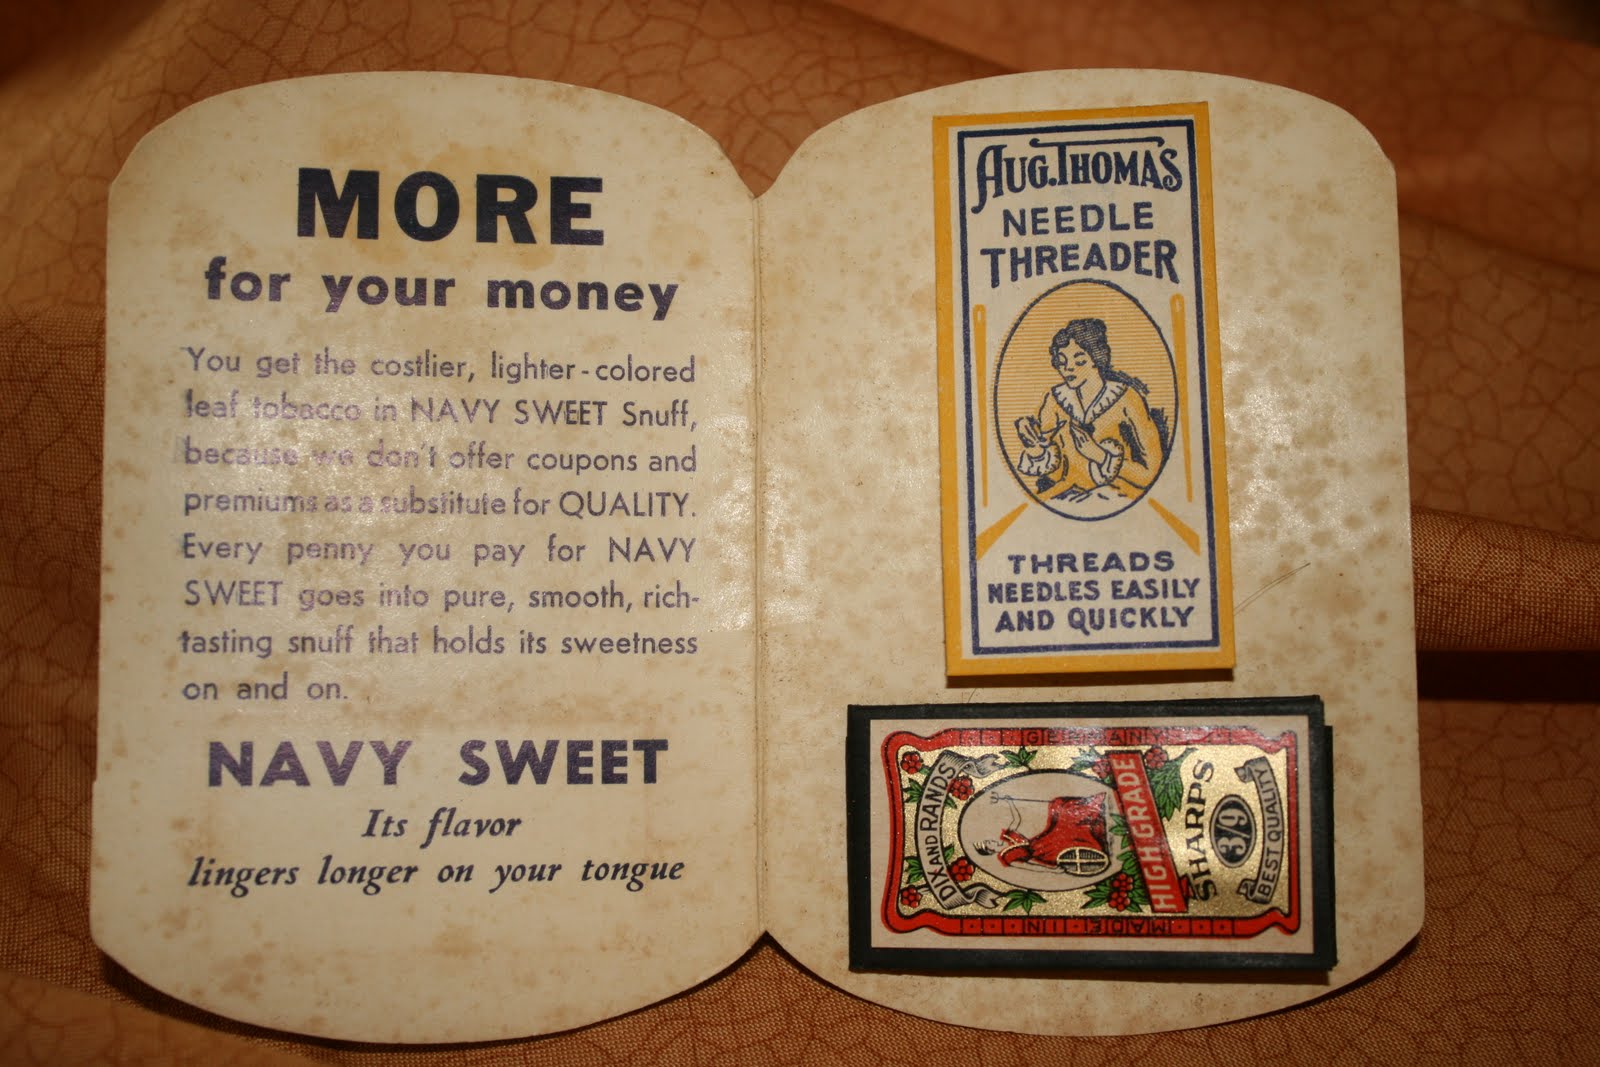
Needles have been around for almost as long as people have worn some type of clothing or sewn a shelter from animal hides. Early needles were made from bone, or in the case of Native Americans in the southwest, made from the spines of the Agave plant. It amazes me just how ingenious people can be! Needles have been an important staple for a long time. I have an old sewing kit that I found in a box of sewing supplies bought with a treadle machine at an auction. I think it was given out as part of Army gear during one of the wars. There is actually a square cut out of the army drab fabric pocket at the bottom of the case. I would love to know why. Did the soldier have to patch his uniform? In this same box, I found an old needle case advertising snuff.


   Modern needles are made from steel or stainless steel and go through a meticulous process of cutting, grinding, stamping, punching, heating, cooling, plating, and polishing. The more tapered and polished a needle is, the better quality it will be.( English and European needles tend to be higher quality than those made in China. Japanese needles can also be higher quality.) Cheaper needles tend to have burrs that will break threads and make the entire process of sewing more difficult. If your fingers are getting tired while doing hand sewing, change to a higher quality needle and see if you can tell a difference. By the way, needles will get dull after much use, so they do not last forever! Because early needles, even those used by your great grandmothers and sometimes your grandmothers, were very expensive and rusted easily, they were run through emery (aluminum oxide) after use and kept in wool. I remember the little "strawberry" at the top of my mother's old pin cushion had a gray powder in it. I'm assuming this was the emery. Modern needles are plated and make this unnecessary.

When trying to buy needles you might be overwhelmed with the different types and sizes. First of all, the size matters to the use. In needles, the larger the size number the smaller and shorter the needle. I can't remember the exact method of sizing, but a simplified way to remember this is to determine how many wires will fit inside a certain diameter ring. (Similar to measuring spaghetti in one of those rings designed for that purpose.) Of course, the thinner the wire, the more wires it will take to fill the ring. If it takes 10 wires to fill the ring, the wire is a #10. If the wire is thicker, it might only take 6 wires, so those thicker wires would be a #6. Of course, I'm sure people who KNOW what I'm talking about are rolling their eyes at my oversimplification, but it works for me. The exception to this rule is the sewing machine needle. They are sized in reverse of this. The bigger the number, the bigger the needle. I don't know why!

In addition to different sizes, there are different types of needles. Here is a simple chart that might help you decide which you need:
Sharps - medium length, general sewing 


Applique - longer length, finer shaft for applique


Quilting(Betweens) - very short length for hand quilting. The shorter the needle, the smaller the stitches you can get.

Milliners - designed for hat making, but because of its longer length and thinner shaft, it is sometimes used in needle turned applique or for basting.

There are other types of needles out there that are not used as often in quilting such as ball point needles used for sewing knits, tapestry needles for crewel embroidery, and darners used for basting and darning ( I'm not sure how many people actually darn anymore!)


Using good sewing machine needles is important also. Some sewing machine manufacturers put out their own brand of needles (such as Bernina) and I'm sure they are really good. I use Schmetz machine needles because I know they are high quality and readily available.

If you are having a hard time deciding which type of needle to use, ask around in your local quilt shop. They generally carry good quality needles and may have some good advice for you.

Sunday, July 25, 2010

Tracing a Pattern

Making applique pieces for quilts usually requires tracing off a pattern. Most of us know the trick of holding the pages against a window in order to trace off a design, but that may not be possible for all of us. (What if you live in Alaska and you don't have sunlight available every day of the year? Or you have a physical restraint that makes holding the paper to the window difficult?) I'm going to show you a very cheap and quick method of putting together a light box to use for tracing those patterns off.

I used an inexpensive box from a discount store. It is actually a box I use for filing. I chose to use the side of this box because it is flat and made of a frosted plastic that diffuses the light. You could just as easily use a regular storage container and flip it over to use the bottom.


Turn the box on its side.....
and place a tap light inside. (A fluorescent light will also work. Don't place an incandescent light bulb against the plastic! You could place a lamp without its shade inside if the bulb doesn't touch the sides of the container and you don't leave it there long enough to heat the plastic!)


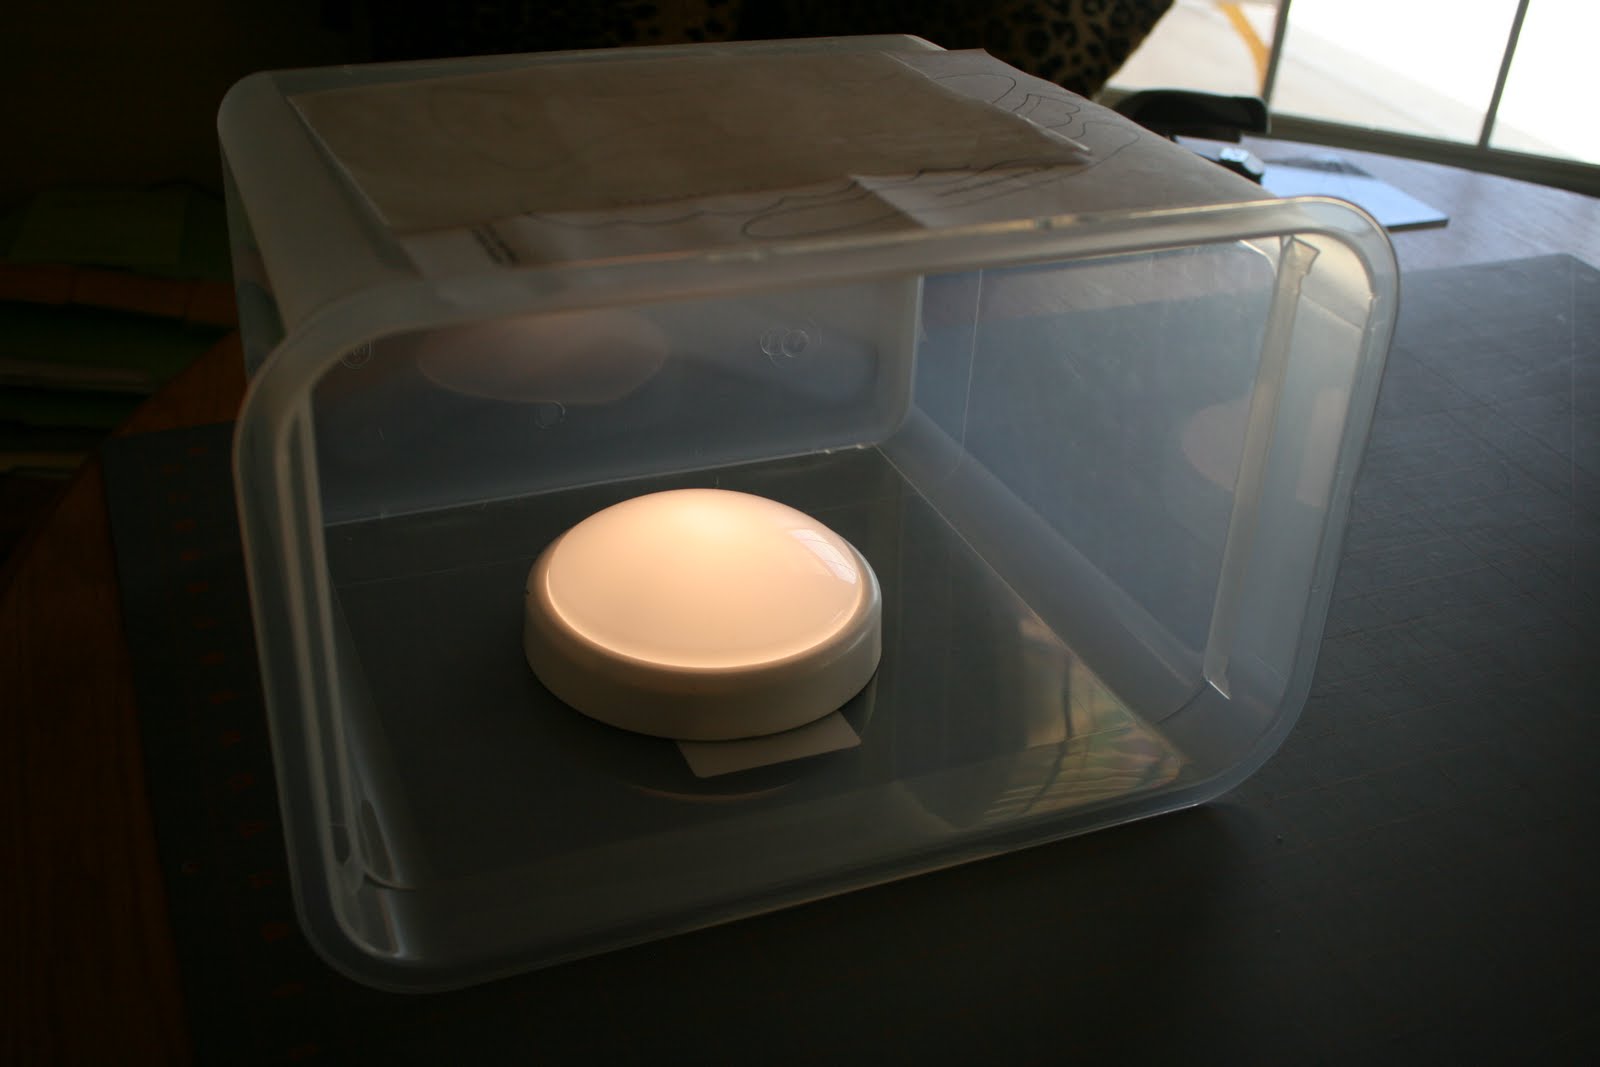
Now just use the top surface as a light table. Place your pattern on the top surface and the paper you are tracing onto on top of that. If the light is not strong enough to make the lines easily visible, raise the light by placing it on books.

Sometimes you need to trace borders or larger surfaces. I use a glass top from a coffee table for this. I prop it up over a tangled mass of Christmas lights (hey, they were easily available!). You could use a lamp or other light source. You can prop the glass up on stacks of books, a cardboard or plastic storage box, or you can just use the coffee table and not take the glass off. (Mine was a glass made to go over a wicker table, so I did not have this option.) Anything you can put a light in and place a "see-through" surface over will work. You can even use your glass baking dish if you can place a light source under it. Keep your eyes open for a scrap of Plexiglas large enough to use for this purpose and keep it with your quilting supplies.

I might mention here that I use a mechanical pencil for tracing. You might prefer a marker, but use a fine tipped one. When I need to trace directly onto my fabric, as when adding words to a border, I have found that Pilot makes a gel pen with thermo-sensitive ink that works like a charm. It is not designed for fabric, but I have been using it with no problems. I trace my words onto the fabric border of my quilt and embroider over them. Then when I touch them with an iron, the lines disappear! Try it on a scrap and see what you think. This is called a FriXion pen. I found mine at Walgreens on the rack with other pens. (I also wash my quilts when completed. Please test anything you use on a scrap first!)
Until next time, have fun!!!

Wednesday, July 21, 2010

Fabrics for Applique

I bought fat quarters last week on sale for $1 each! Just looking at all the colors and patterns inspires me. I collect visual textures to use in my applique. I have a box in which I keep only fabrics that have lines, colors, or patterns that suggest other things such as hair, brick, water, sky, grass, and so on. Fat quarters are especially good  for this use since you rarely need more than that for an applique. It's a good exercise to look at fabric and use your imagination in thinking what it could represent - sand on a beach? fur on a cat or dog? tiles on a roof? 
Some remind me of water,
 some of food. Some just appeal to me because of their lines and visual textures and I don't know what they might become. 


The next time you are in a fabric store, try to notice the possibilities in the fabrics. Start a collection that can be used later when you need just the right fabric to suggest a delicate butterfly wing or feathers on a bird. You'll be surprised at what you'll start to see.
Have fun!

Monday, July 19, 2010

Blocking a Quilt

I learned after a couple of years of quilting that I should block my finished quilts. This is not something I had ever seen in books when I was learning to quilt.  Perhaps that is because it is not as necessary in large bed sized quilts or quilts that are quilted on a frame. Quilts such as wall hangings, crib quilts and lap quilts show up any warping more because of their small size. I machine quilt on my home sewing machine, and that can further warp the quilt because of all the "acrobatics" involved in getting all that bulk through the narrow throat of a sewing machine. In any case, I love the look of  freshly blocked quilts, so I always take this step in finishing them.

First of all, I throw my finished quilt in the washing machine after machine quilting it. I do this because I use spray basting to baste the layers together before quilting. I also use chalk or other means of temporary marking to mark quilting lines and I want all of this removed. I also like the slightly puckered "antique" look washing gives my quilts. It slightly shrinks everything and tightens it up. If anything is going to come unsewn, it will most likely happen during washing, so I can repair it. I like to wash and block my quilt after sewing the binding on, but before turning it and sewing it to the back. In this way, it tends to lie down flatter as opposed to getting those little diagonal wrinkles caused by shrinking after washing. I do a gentle wash in cold or warm water, using only a fraction of the usual amount of detergent. I let it go through the final spin to remove any excess water.


In preparation for blocking, I put a white vinyl tablecloth (the type with a flannel backing) on a thick rug or carpet. I put the vinyl side down. You can also make a blocking mat of foam core insulation covered with a white sheet. The idea is to have a surface that will holds pins.

Lay the wet (but not dripping) quilt on this surface and begin by squaring one corner. Pin every few inches and gently pull the edges into alignment if you need to. The quilt is quite malleable while wet. Note that the binding has NOT been turned and sewn at this point.

After squaring up the first corner, pin the edge leading up the the opposite corner straight. It should be taut. I did the top two corners, but you can start anywhere. Now square this corner in the same way.

Make sure that the edge between the two squared corners is straight and even. If you angle the pins away from the quilt, they will hold against any pulling better. Measure the distance between the two squared corners.
  Start pinning the sides of the quilt down, making them straight and measuring across the quilt as you go to be sure the measurement stays the same. (Measure from top to bottom also to be sure the length of the quilt stays the same.) When you get to them, square the remaining two corners as you did the first.

Leave the quilt overnight or several hours until dry. When completely dry, remove the quilt (after removing the pins) and you are ready to sew the binding down. (Note: you are getting a sneak peak at one of my new quilts. The pattern will be available soon. This is an original copyrighted pattern.)

You can also block old quilts or previously finished quilts. If you don't want to go through the washing machine step, you can spritz them with water until they are wet enough to be malleable. Yes, you can block them after the binding is sewn on as well as before. If you have never blocked a quilt before, I think you will really like how nice the quilt looks after this step. Give it a try!

Friday, July 16, 2010

Tools for Applique

I love working on applique. My idea of a pleasant evening is sitting on the couch, doing handwork, and  watching an old movie. (a Christmas movie is best, like "Miracle on 34th Street" or "Christmas in Connecticut").
If you find applique difficult but you enjoy handwork in general, you might be using the wrong tools. The needle you use makes a big difference. There is a major difference in cheap and expensive needles. It is in the way they are manufactured. Cheap needles are thin wires cut into lengths and then tapered at one end. They are straight down the sides until you come to that taper. Expensive needles are tapered from eye to tip. This makes them easier to push into the fabric. You have less resistance while sewing.

Thread is another important factor in making applique easier. I use #100 weight silk thread. It is strong, but so fine it nestles in among the fibers of the fabric and is less noticeable. Sometimes I use a conditioner on my thread, like bees wax, to keep it from tangling. I will mention here in case you don't already know, that you should knot the end you cut from the spool. When you do that, you pull the thread through the fabric in the direction the thread was spun. You will have less wear and tear on the thread this way. If you lick the end of the thread, it can cause the thread to swell, making it harder to put through the eye of the needle. (I have to admit here that I do it anyway and then flatten the thread end by pulling it through my teeth to give a very flat surface to push through the eye.)

Stitches should be about 1/8" apart and taken through one thread of the fabric just at the edge or underneath it. The goal is to hide the stitches and secure the top layer as well as if you had sewn it on the machine. If arthritis or  other constraints keep you from making nice stitches, you might want to explore machine applique. Of course, if the quilt you are making is for a grandchild or other family member, they probably will be thrilled to have something made by you and they won't mind the stitches showing. Have fun with it and accept your less than perfect work! You don't have to enter it in a show to be scrutinized. Enjoy the process and you will improve!

Wednesday, July 14, 2010

Choosing Colors

My sister, who is an art teacher and accomplished watercolorist, pointed out to me that I should explain WHY I chose the colors I did. Not everyone has training and background in art and color theory. Some of you have what we call "an eye for color" and some do not. Some of us just SEE that some colors look better together without knowing the "rules" behind it. There are hundreds, if not thousands, of books on the subject. I will attempt to give a little nutshell lesson here and give you more later.

Most of you learned about the color wheel some time in your life. You know that the primary colors are red, blue, and yellow. Unless you're talking about light, black is made up of a combination of all the colors and white is the absence of color. You can play with paints or crayons and discover this if you have never done that. I used to give my kindergarten students only red, blue, and yellow paint at the easel the first week of school. When they asked for green I told them that they could find it by mixing two of the colors together. They always found it. AND they never forgot it. Later I added white. Another week I added black. Play is a good way to learn.

I've attempted to put together a makeshift color wheel made up of fabric, for that is what we are dealing with anyway. The primary, or first, colors are red, blue and yellow.
You can make secondary colors from these. The secondary colors are green, orange, and purple (or violet). If you don't already know, red and blue make purple, red and yellow make orange, and blue and yellow make green. Using only these colors, you can learn in important lesson on combining colors. If you take any secondary color on the color wheel and go to the primary color opposite it, they will be complimentary colors. For instance, purple is a compliment to yellow, orange is a compliment to blue, and green is a compliment to red. (You may have discovered as a child that if you mix these compliments in paint, you will get a brown.) Adding white or black gives you tones and shades, which I will discuss another time. If the colors are in a small print, for instance, a yellow background with tiny purple flowers, your eye tends to blend these colors when viewed from a distance and the fabric will tend to look brownish. For this reason, you have to be really careful of the size of your print. Always view a fabric's impact on another fabric from a distance.

If you don't want to use complimentary colors, which tend to be eye popping, you can choose another type of color scheme. You can choose two primary colors that are side by side, for instance. Blue and yellow are very popular colors. Or you may choose to use different values of the same color - an all red quilt, for instance. You can add interest by throwing in touches of a secondary color. Red with touches of orange or purple. Blue with touches of green or purple. Etc.

There are some good tools in the stores that might help you. A good one to have is the 3-in1 Color Tool by Joen Wolfrom. It is by C & T Publishing. It is the equivalent of having someone knowledgeable hold your hand while you choose colors. It has color "swatches" for each of the 24 colors they have given (they give you an entire spectrum) and on the backs of each are color plans.

I'll talk more about color later. Consider this a refresher for "stuff" you probably already knew. Color is the one thing that will make your quilt either ho-hum or outstanding, regardless of your workmanship. I've seen beautifully quilted quilts that just aren't pretty because of the colors. It is something you should be aware of.

Until next time, notice colors in nature and how they combine. They don't follow the rules and often get away with it, so there are always exceptions!

Tuesday, July 13, 2010

Applique My Way

My preferred method of quilting is applique. I am able to piece, but piecing is not fun for me. I like to sit down and draw out an idea, draw off my figures on a big sheet of freezer paper, cut them out, iron them to fabric, turn the edges under, and then find a good background for it all. I need a large stash of fabric in order to design this way, but fabric is eye candy for me anyway. I love seeing all the colors and textures on my shelves. Maybe because I taught elementary school for 20 years, my quilts are more like illustrations out of a children's book than anything else. I "compose" them as I go, trying out different fabrics along the way. I can never go into a quilt shop and say "I need 1 1/2 yards of this fabric and 3/4 yards of this one". I don't know until it's done! Then I can go back and measure just what I used.(If you are using my patterns, this is already done for you.)

When I first started quilting, I tried every method of applique I could find. They all seemed too "piddly (a good Southern word) for me. I wanted to approach quilt design much as I approached illustrating. I wanted an image that I could plunk down on fabric and "audition". I somehow started using the method I use now. I actually came by it accidentally. I was reading a freezer paper method and because I tend to "read" the pictures  instead of reading the directions, I ended up ironing the freezer paper to the front of the fabric instead of the back and turning the seam allowance to the back.  It worked like a charm. Now, I'm certain I didn't come up with this method, but I wonder if others who use this method originally made the same mistake I did.


If you go to my pattern website, www.b-bumble.com, you can see a tutorial under Getting Started that shows this applique method step by step.

Currently, I'm working on a new design.I almost have all the applique finished and I need to embroider some vines and things still. I have a vase in it. The vase looked good in all the fabrics I tried out, but I was able to see it in relation to the entire color scheme of the quilt by using my method. I will try to post photos of the vase area of the quilt top and the different vases I "auditioned".
 They all worked, but only one was just right. I will show the entire quilt when I get closer to finishing it. I still need to connect the ivy leaves with embroidered vines. By the way, I discharge dyed a few leaves to give it a more realistic pathos ivy look. I did this by brushing bleach in areas of the fabric and letting it take the color out in those areas. I had to then wash it well and submerse it in vinegar to neutralize the bleaching process. Not all fabrics will bleach out to white when you do this. You have to test it.

Hopefully, as I learn as a blogger, I will be able to give you lots of hints and tips to make your quilting easier. I would also like to throw in a few other creative ideas every now and then. So, until next time, have fun!
Related Posts Plugin for WordPress, Blogger...