 |
| First Flight |
First of all, I have already given tutorials for creating your own skin toned fabric and for preparing the figures for applique, so I will not duplicate that. If you want to see those tutorials, you can find them here:
http://buzzingandbumbling.blogspot.com/2011/03/using-tea-or-coffee-to-create-flesh.html
http://buzzingandbumbling.blogspot.com/2011/03/applique-tutorial.html
 |
| 1. After turning the edges on your applique piece, cut a piece of batting a little smaller than the turned face. Set the batting aside. |
 |
| 2. Peel off the freezer paper and trace the face onto the front of the face piece. (Although you see a pen in this photo, use a mechanical pencil and draw lightly!) |
 |
| 3. Glue the batting to the back of the face. You don't really need a lot of glue, just a little around the edges. |
 | |
| 4. Using a pair of small, pointed scissors, carefully cut the eyes out of the freezer paper face pattern and iron it back on the face, lining up the eyes carefully! |
 |
| 5. Now you're ready to paint. Using craft acrylics, carefully paint inside the eye area with white paint. It is helpful to stroke from the paper to the fabric instead of from the fabric to the paper, as doing that can force the paint under the paper.. Do not water it down! Let it dry completely before going on to the next step. |
 |
| 6. Pencil in the iris and pupil of each eye. You can cut them out of the pattern if that is helpful to you and just trace the outline. |
 | |
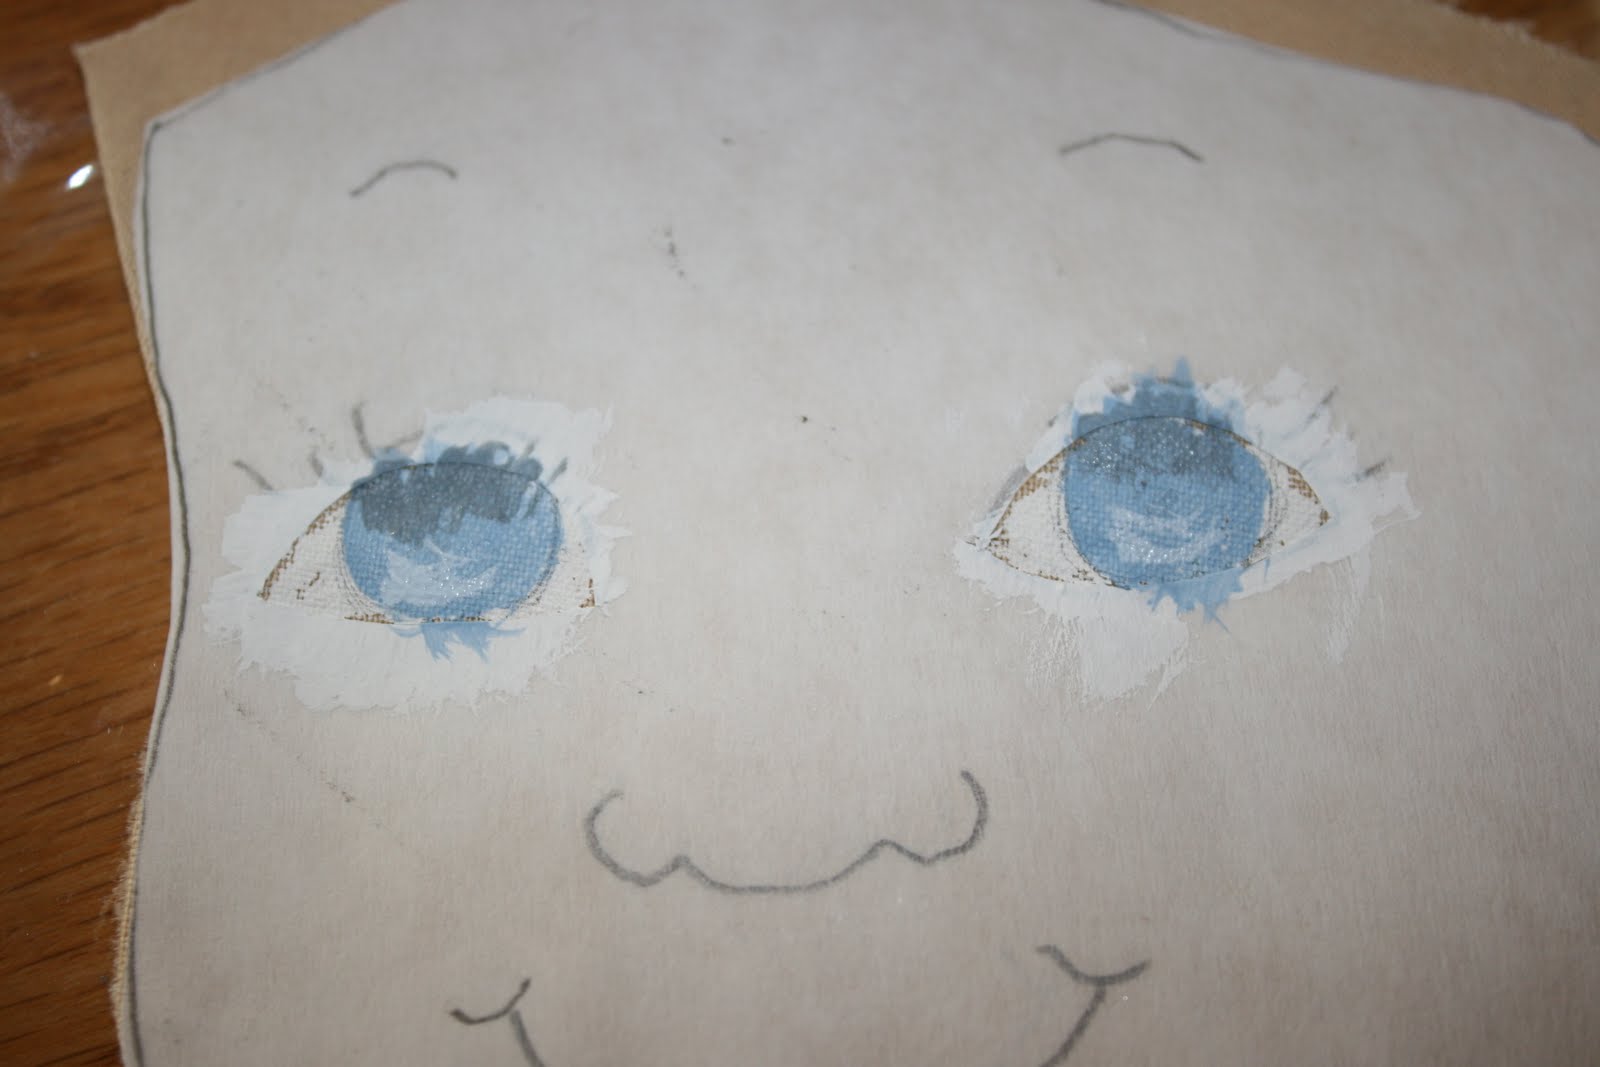
| 7. Again using craft acrylic, but in the eye color you want, paint inside the iris area. |
 |
| 8.Mix a dab of black with your eye color to make a darker shade to give shadow below the upper eyelid. |
 |
| 9. Do the same with a dab of white paint to make a lighter shade to put above the lower lid. This shading is not absolutely necessary but will give your eye a nicer look. |
 |
| 10. Dip the tip of the"tail" end, the end with the bristles, in the black paint. |
 |
| 11. Dab onto the pupil area of each eye. If you want a larger pupil, use a larger brush end. |
 |
| 12. Make two dots of white beside the pupils - one above and one below. This is important to giving the eye "life". |
 |
| 13. After the paint is dry, peel off the freezer paper. |
 |
| 14. Embroider features using 2 strands of floss. I use brown for eyebrows, upper lid, and eyelashes and dark flesh for other features, including lower lid. |
 |
| 15. Using floss of your eye color, embroider along the edges of the iris. |
 | |
| 16. For the cheeks, I use a "PaintStik" made by Shiva. You can also use powdered blush (although it will not be permanent) or crayon (use very carefully). The PaintStik is permanent when heat set. Follow the instructions on the label to use. I use pink. |
 | |
| 17. I apply some of the "PaintStik" to the shiny side of a scrap of freezer paper. I then pick up a little on a stencil brush. (A stencil brush has a flat, stiff bristle end. It is different from a regular paintbrush. You could experiment using a cotton swab.) |
 |
| 18. Brush off most of the color on a scrap of fabric. |
 |
| 19. "Scumble" the color onto the cheek area very lightly. It is much easier to build up from too light to just right. It is difficult to take paint off! Also put a little color in the ear area. I often add color to the knees, elbows, hands, etc. Press face with an iron to set the paint. |
Give it a try! Making faces can be fun!
Hop on over to the Confused Quilter for a special giveaway this week! Staci is giving away 5 of my patterns!
Thanks, Linda! The faces on your quilts are so cute and really bring life to your quilts!
ReplyDeleteLaDonna
AHH MAY ZING!!
ReplyDeleteI bookmarked this! Thanks so much...blessings,marlene
ReplyDeleteHow adorable!!! Thank you!
ReplyDeleteFantastic! This little face is just so adorable.
ReplyDeleteHi Linda! So glad you stopped by today. You are one talented lady. This side of quilting hurts my brain! I have not tried it but I thank you for breaking down the process so that I may give it a try! Blessings!
ReplyDeleteI love the way you create such beautiful faces! Thank you for the tutorial!!
ReplyDeleteThank you for sharing this at www.rocknquilts.blogspot.com for Toot-torial Tuesday!
ReplyDeleteAwesome tips, thanks. I'll have to try this with my sister when she visits.
ReplyDeleteWonderful tutorial! Thank you so much for sharing your talent!!!
ReplyDeleteThis is an awesome tutorial. Thank you, Thank you, Thank you for giving us a great way to create a face via applique methods. It just never occurred to me to try paints and wow, what a great great tip. You can't even know how really grateful I am. Hugs!!
ReplyDeleteThank you for this awesome tutorial. I will pin it on Pinterest. Love.
ReplyDeleteWhat a great tutorial. Hope to use this technique soon. Thanks.
ReplyDeleteWhat a great tutorial. Hope to use this technique soon. Thanks.
ReplyDeleteidnplay apk
ReplyDelete